What is Octobox?
The short answer, it is amazing! The main site can be found here, and the source code on GitHub can be found here.
The slightly longer answer, it is a UI that allows you to take back control over your GitHub Notifications, with functionality for:
- Archiving Notifications
- Starring issues/pull requests
- Getting an indication on the sort of subscription you have on the issue/pull request
- Loads of other features that will help you make sense of all the notifications
Why do you need this?
If like me, on a daily basis you will have a torrent of email notifications that come through for the different issues/pull requests that you have subscribed to on GitHub. These could be for issues/pull requests that you have raised, and a response is required from you, or simply issues/pull requests that you have a vested interested in following along. Whatever the reason, the amount of notifications is huge, and can be overwhelming. The main problem with both email and web notifications, is that normally once you have looked at them, they are gone, never to be seen again. If you get distracted and move onto something else, it is all to easy to forget what you were looking at.
Octobox to the rescue...
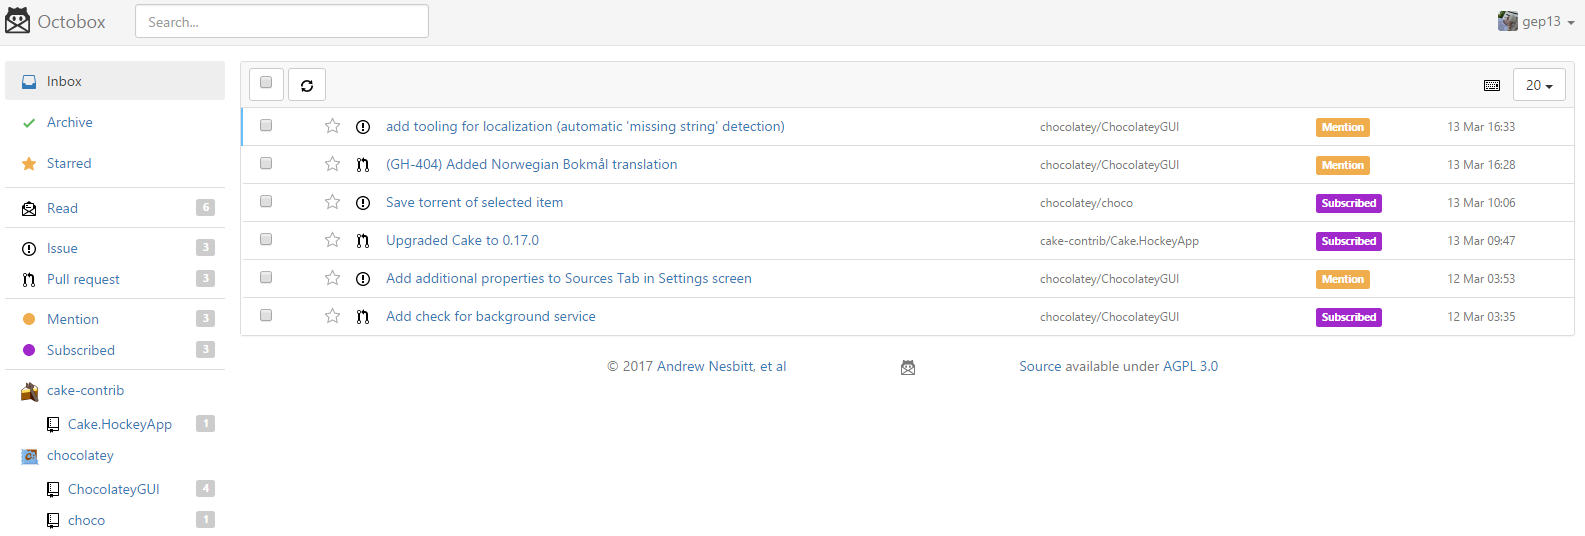
This is where, for me, Octobox shines! Once configured, issues/pull requests that you are actively looking at remain in your "Inbox", as can be seen here:
Once you are finished with an issue/pull request you have the option of archiving it, but have no fear, if another notification comes up for that issue/pull request, it will come back into your inbox.
It is not a very difficult concept, but the way it is implemented is VERY compelling, and such an improvement on the current notification system in the GitHub UI.
Enough already, how to we use it?
There are a couple options here...
Firstly, you can use the shared instance at http://octobox.io, however, this is limited in some functionality due to not being able to use shared key.
Secondly, you can deploy your own instance to Heroku, which seems like it would be very simple to set up and configure.
Thirdly, you have the option of running Octobox in Docker. I opted for this option for a couple reasons. I have never really used Docker in anger, and I wanted to see what all the fuss is about. And also I have a reasonably beefy Synology Server that really isn't doing anything, other then running CrashPlan and Plex. So I thought I would take it for a spin.
Setup steps
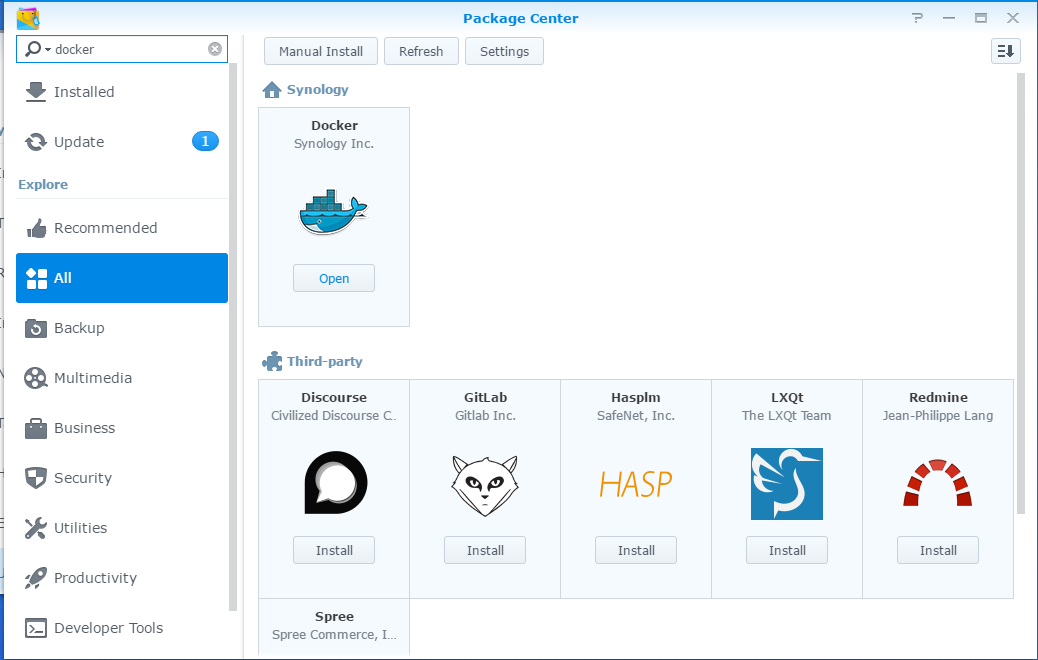
1. Install Docker
This is a reasonably straight forward process. Login to the DSM and select Package Center, and then search from Docker. There should only be one result, with the option to Install. NOTE: The screenshot below shows the Open option simply because it is already installed.
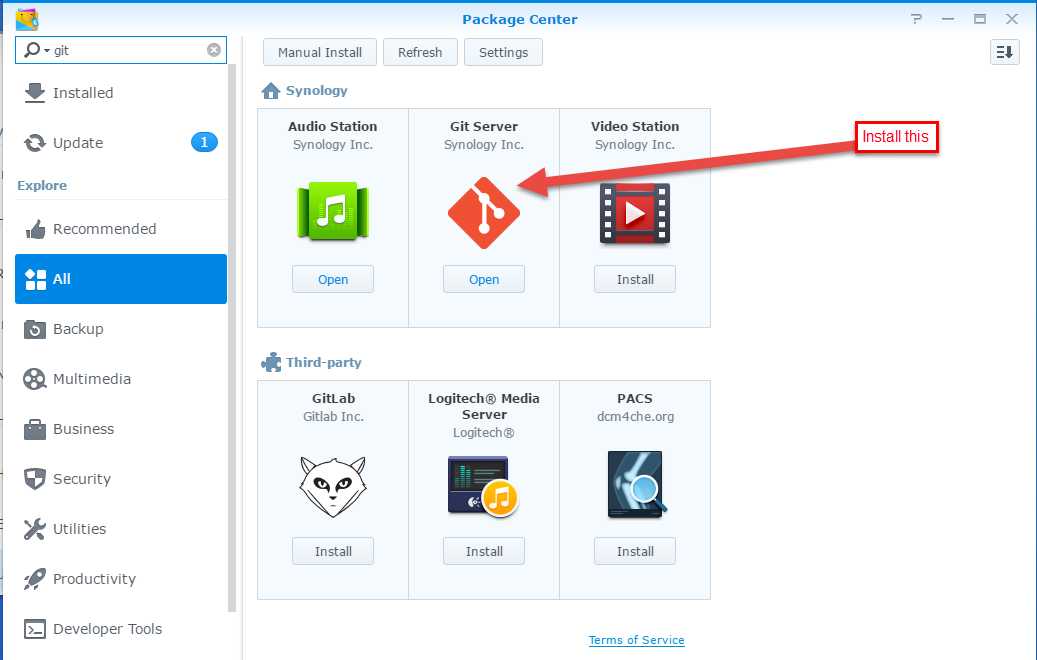
2. Install Git Server
In order to download the latest source code for Octobox, you are going to need to have git installed and running on your Synology Server. The easiest way to do this is to install the Git Server Package. Once again in the Package Center, search for git, and install the Git Server Package.
3. Clone the octobox repository
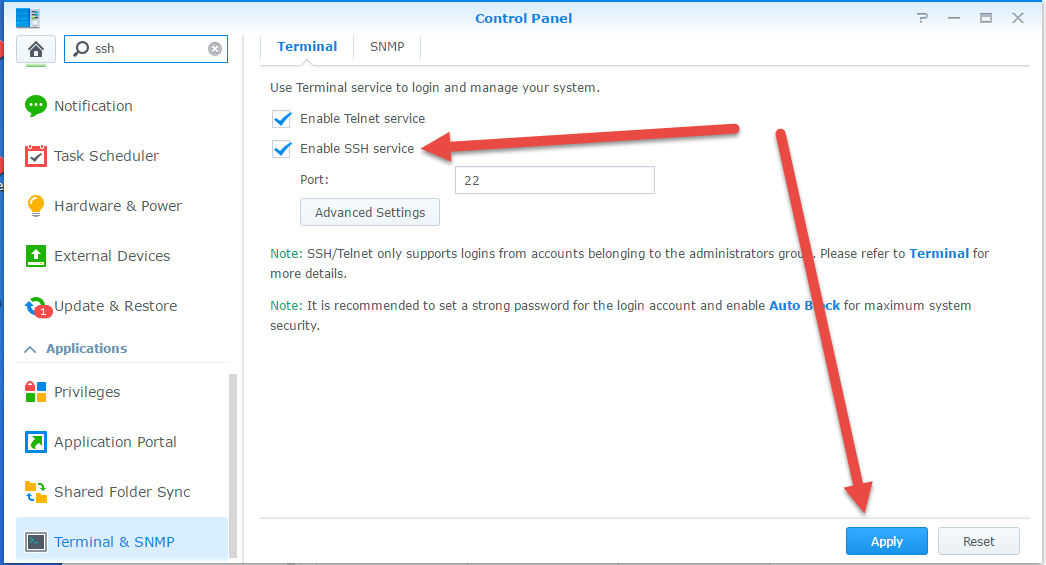
Next up, we are going to need to clone the octobox source code onto the Synology Server. In order to do this, we are going to need to execute commands over SSH on the Synology Server. To do this, you will need to make sure that the SSH Service is running, and then establish an SSH connection to the Server. First things first... In the DSM, select Control Panel, and then search for SSH. In the results, select Terminal and SNMP, and make sure that the following checkbox is ticked, and then click Apply:
Now, using an SSH Client application (I personally use kitty, which can be installed easily using chocolatey, choco install kitty), connect to the Synology Server. This will require entering in your Synology Server IP address, and the same credentials you use to access the DSM.
Once in, create a folder for cloning the repository:
mkdir github/clones/octobox
and navigate into that folder:
cd github/clones/octobox
and then clone the repository:
git clone https://github.com/octobox/octobox.git
and finally, navigate into that newly created repo:
cd octobox
4. Create an OAuth Application for Octobox
In order to run the Octobox application, you are going to need a GITHUB_CLIENT_ID and GITHUB_CLIENT_SECRET. These can be acquired by setting up a new OAuth Application within GitHub. Go to the following URL and set up the application using the IP Address of your device, in my case:
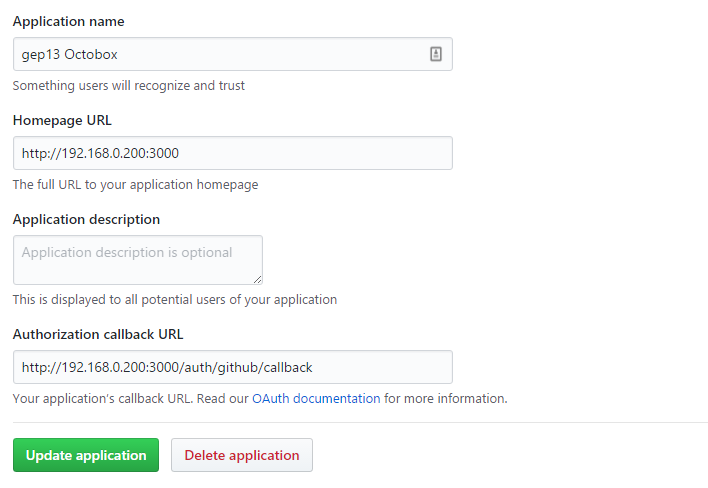
Take a note of the Client ID and Client Secret that will be generated for the application.
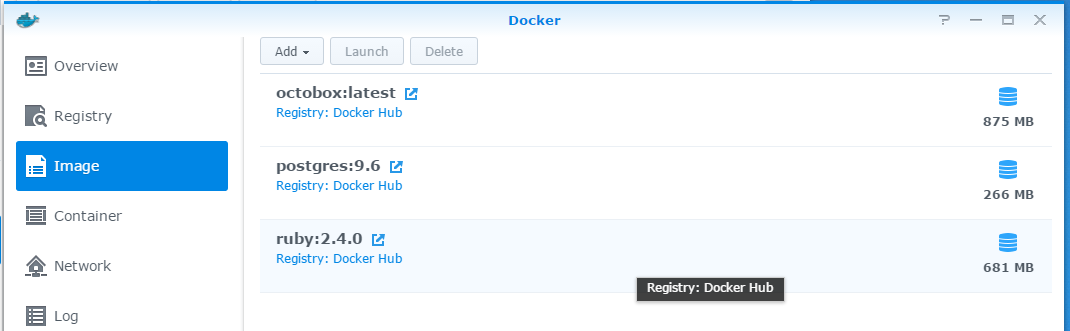
5. Create the Docker Containers
In order to run, Octobox needs two Docker images, namely a ruby and postgre image. Once instantiated, these images will run together to execute and persist the various information within the application. Octobox makes use of Docker Compose to orchestrate the creation and running of these Containers. To start that process (which the first time you run it will take quite a while) you can run the following command:
GITHUB_CLIENT_ID=yourclientid GITHUB_CLIENT_SECRET=yourclientsecret docker-compose up --build
NOTE: Replace the required sections with the client id and secret that you got in step 4
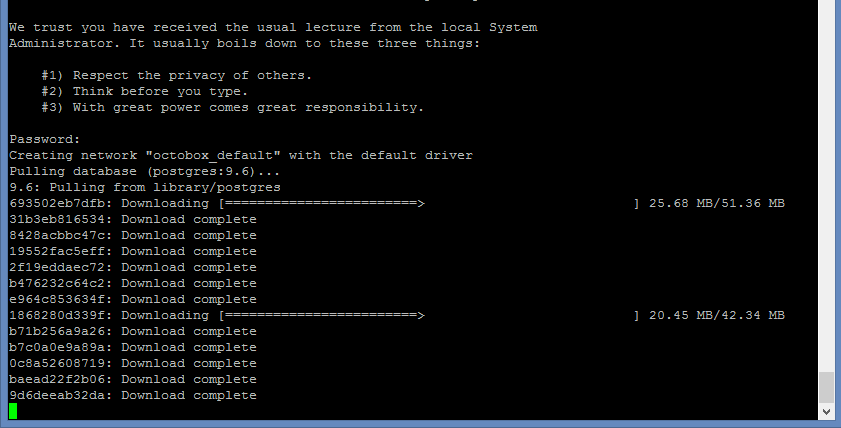
Now, if like me, the first time you run this, you will get this:

However, if you run this again using sudo and accept the mandatory lecture, it should start running:
6. Get a coffee/tea
Now that this process is running it will take a while, so I would advise going to grab a beverage. On my machine, it took about 30 minutes to complete. During this process, if you look at the Docker UI within the Synology DSM, you will see it creating temporary Containers, which will ultimately be renamed:
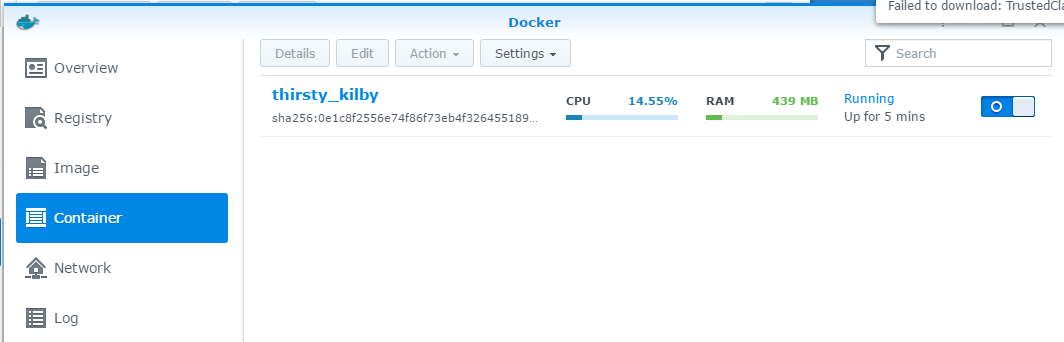
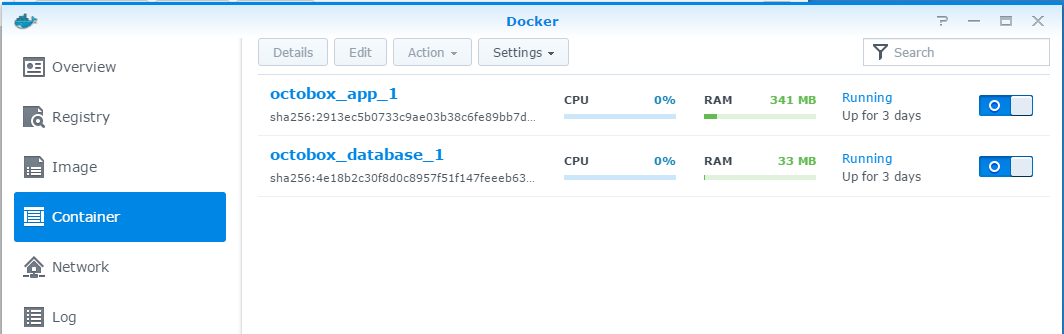
The end result, once complete, should look like the following:
7. Doh!
Now, after all that waiting around, like me, you might end up with the following error message:

In all honesty, I have no real idea about what this error means, but, if you go to the URL that is mentions, and run the command that is lists (which at the time of writing was the following):
echo fs.inotify.max_user_watches=524288 | sudo tee -a /etc/sysctl.conf && sudo sysctl -p
You should see the following:

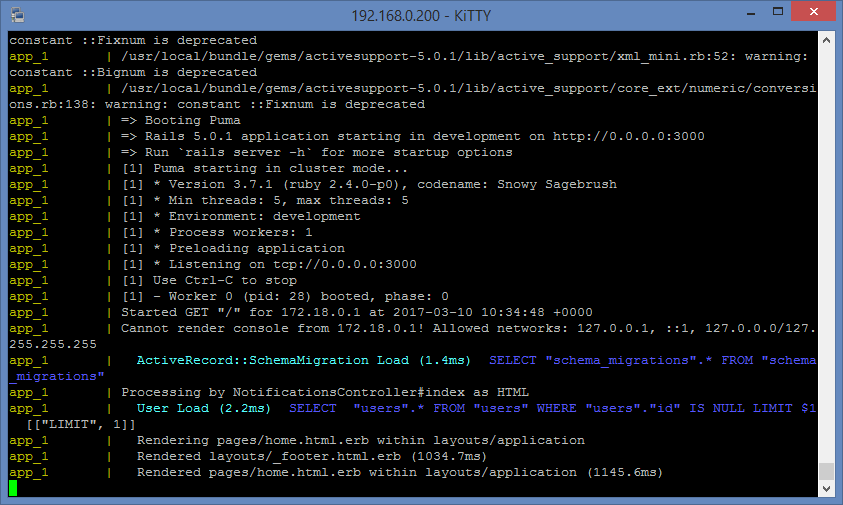
Then, if you run the docker compose command again, which should take far less time the second time around, you should be met with the following:
8. Open Octobox
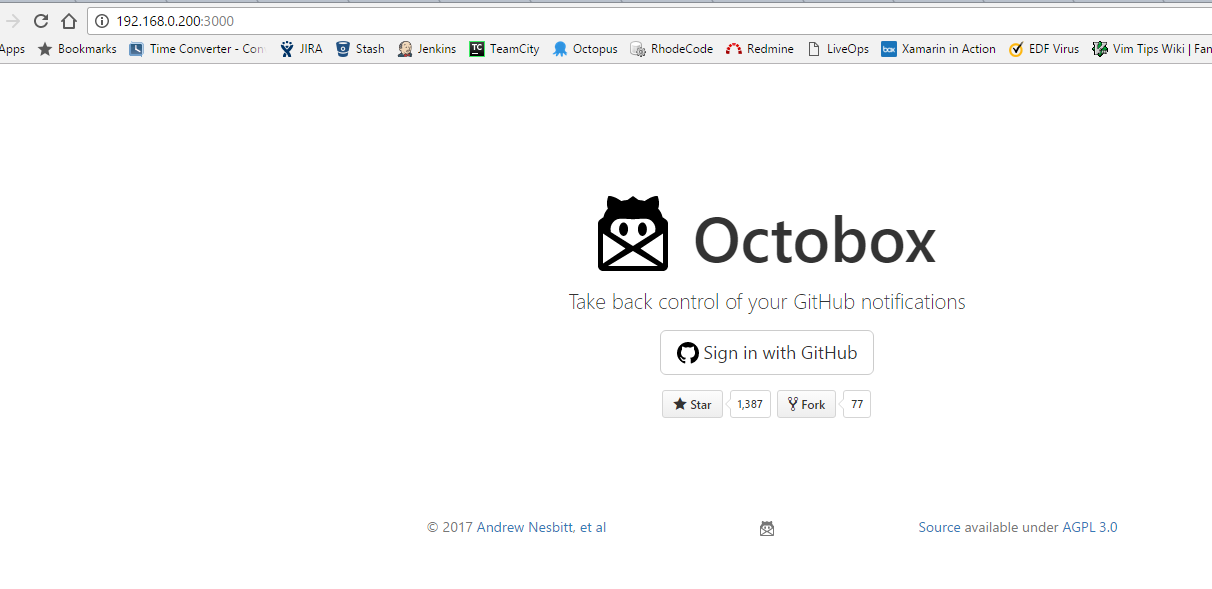
Fire open your browser of choice, and point it at http://<synology_server_ip_address>:3000 and hopefully you will see the following:
And you will be able to login to the application using your standard credentials.
9. Run docker command in background
The command that we ran earlier run in process in the kitty session that we created. As a result, hitting CTRL + C, or terminating the session will also terminate the Docker Containers, which is not really what we want. Instead, go ahead and run the following command:
GITHUB_CLIENT_ID=yourclientid GITHUB_CLIENT_SECRET=yourclientsecret docker-compose up --build -d
NOTE: The important -d switch at the end. This will run the command in the background, and allow you to terminate the kitty session without stopping the containers.
10. And that is that!
And that is all there is to it! I have been using Octobox for a couple days now, and I have to say that it is amazing! I have been able to turn off all email notifications now, and I still feel that I am getting all the information that I need, and more.
As one point of follow up, rather than typing out the above command, you might want to take a look at this blog post which describes how to use an .env file to store the secure information. Big thanks to Alistair for his help here!
comments powered by Disqus